Online Account Portal “How-To’s”
Accessing your online account is easy with Pico Propane and Fuels!
Beginning June 2022, Pico Propane and Fuels will launch their all-new customer online account portal. If you’re an existing Pico customer, we think you’ll love this new interface! To get started using the new portal, follow these simple step-by-step instructions to create both a login and password. Once complete, you’ll be ready to order fuel, make an online payment, and so much more.
If you’ve already setup your online account, please click here to login.
To quickly access any of the sub-topics covered here, click the corresponding links below:
Creating Your Account
Paying Your Bill
Setting Up Automatic Payments
Request a Delivery
>> Creating Your Account <<
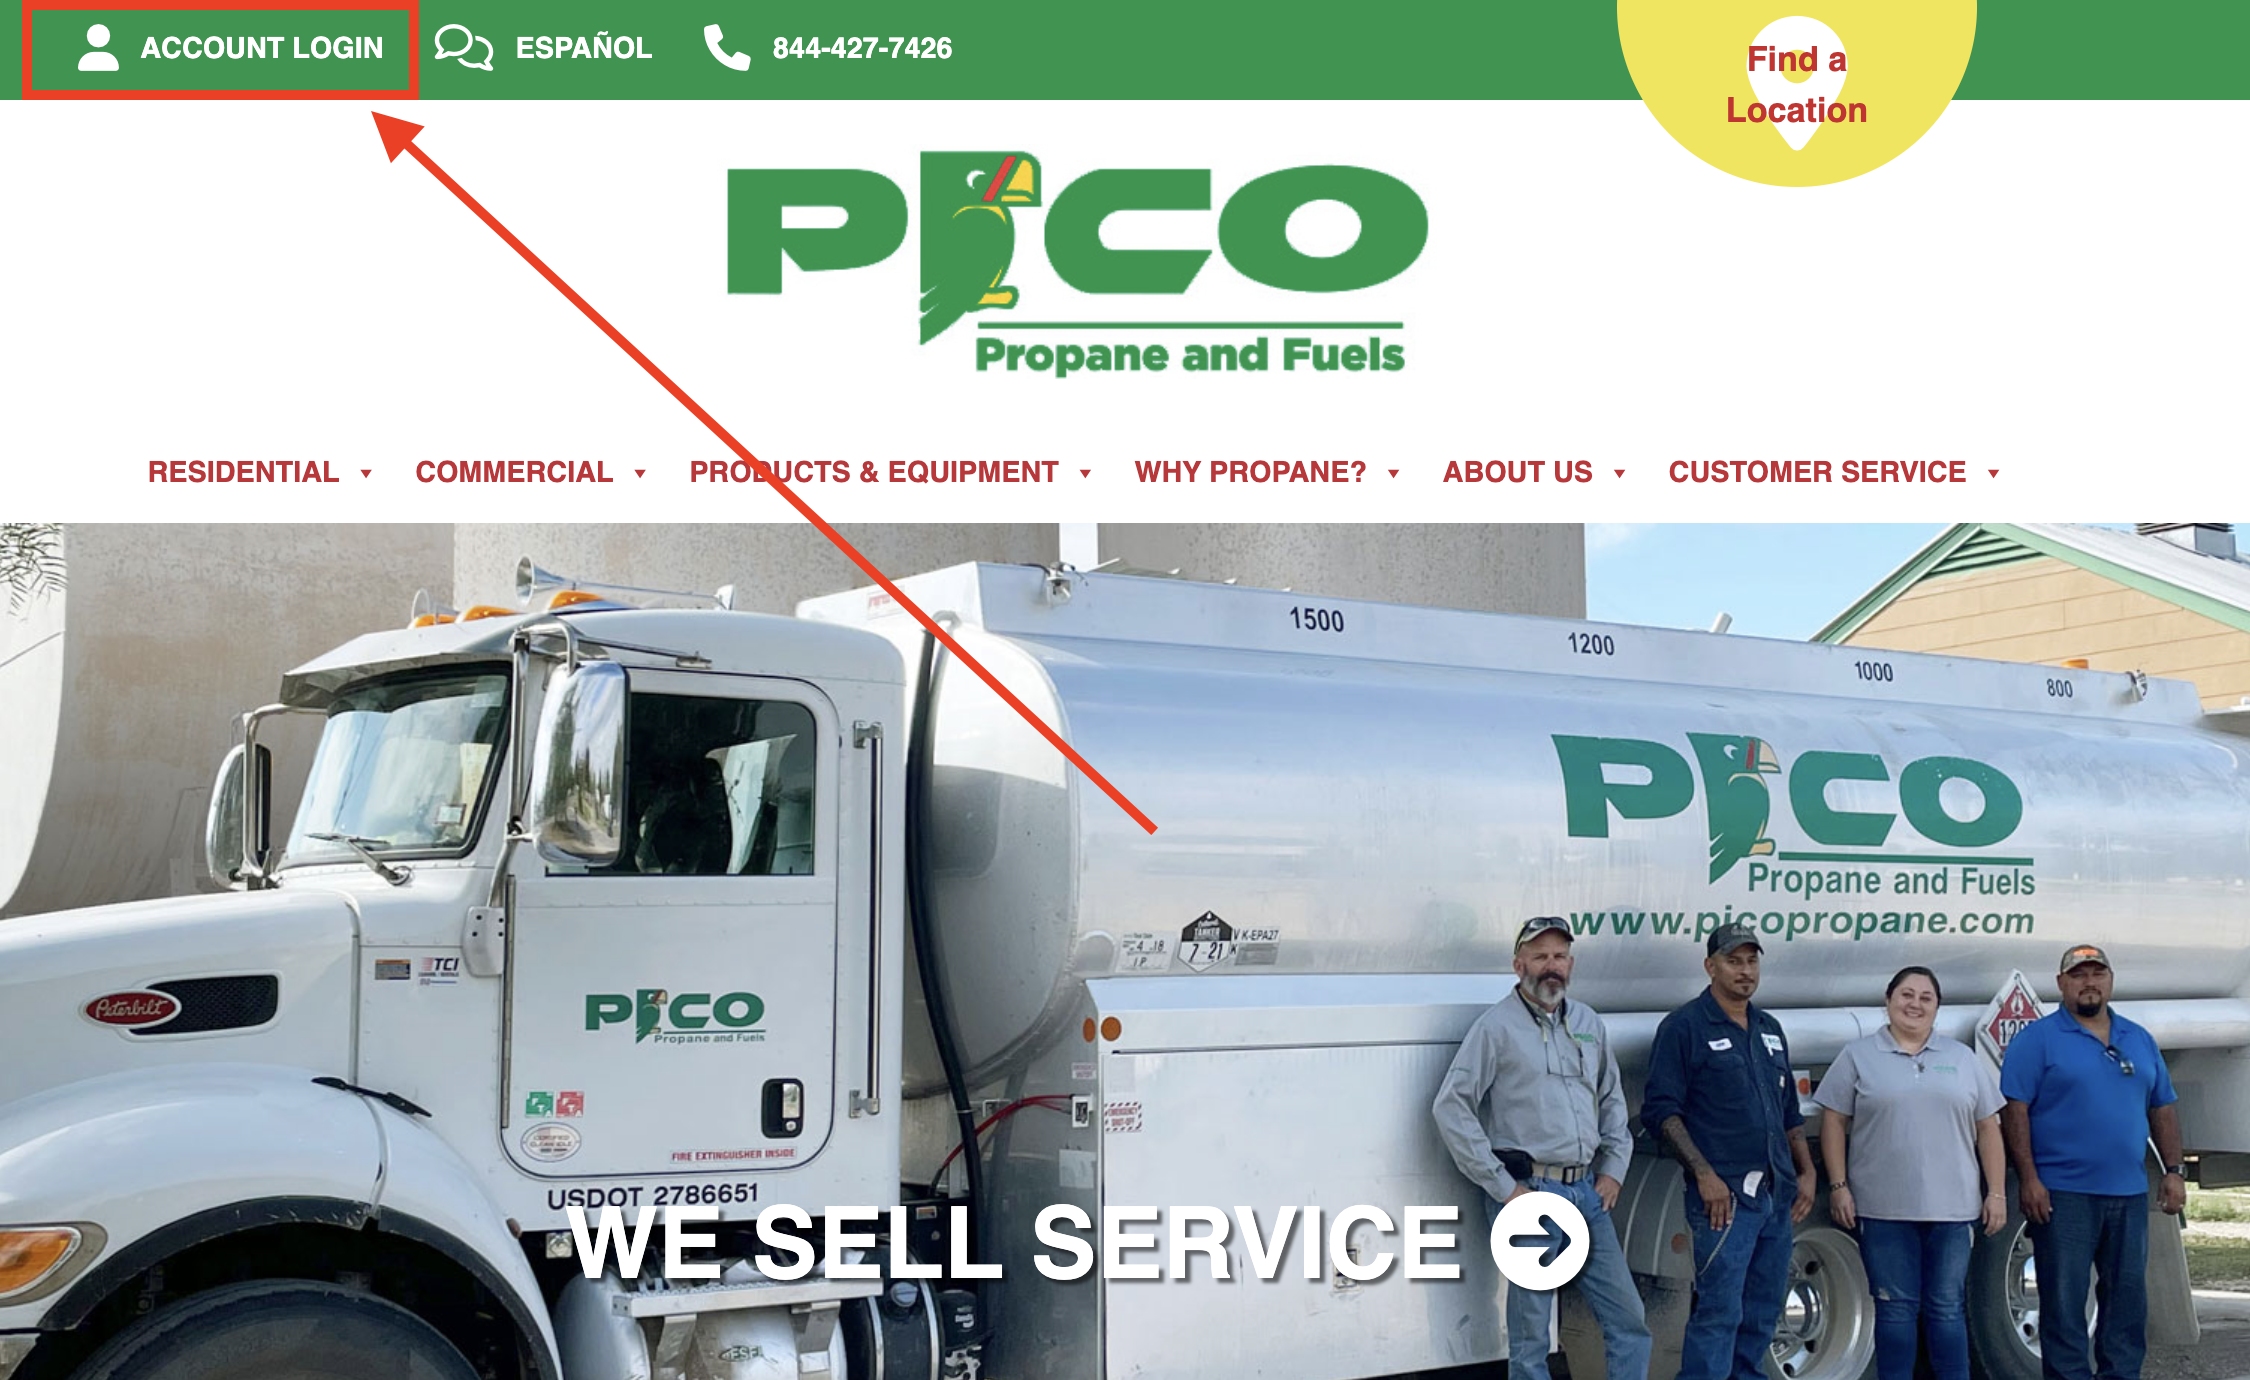
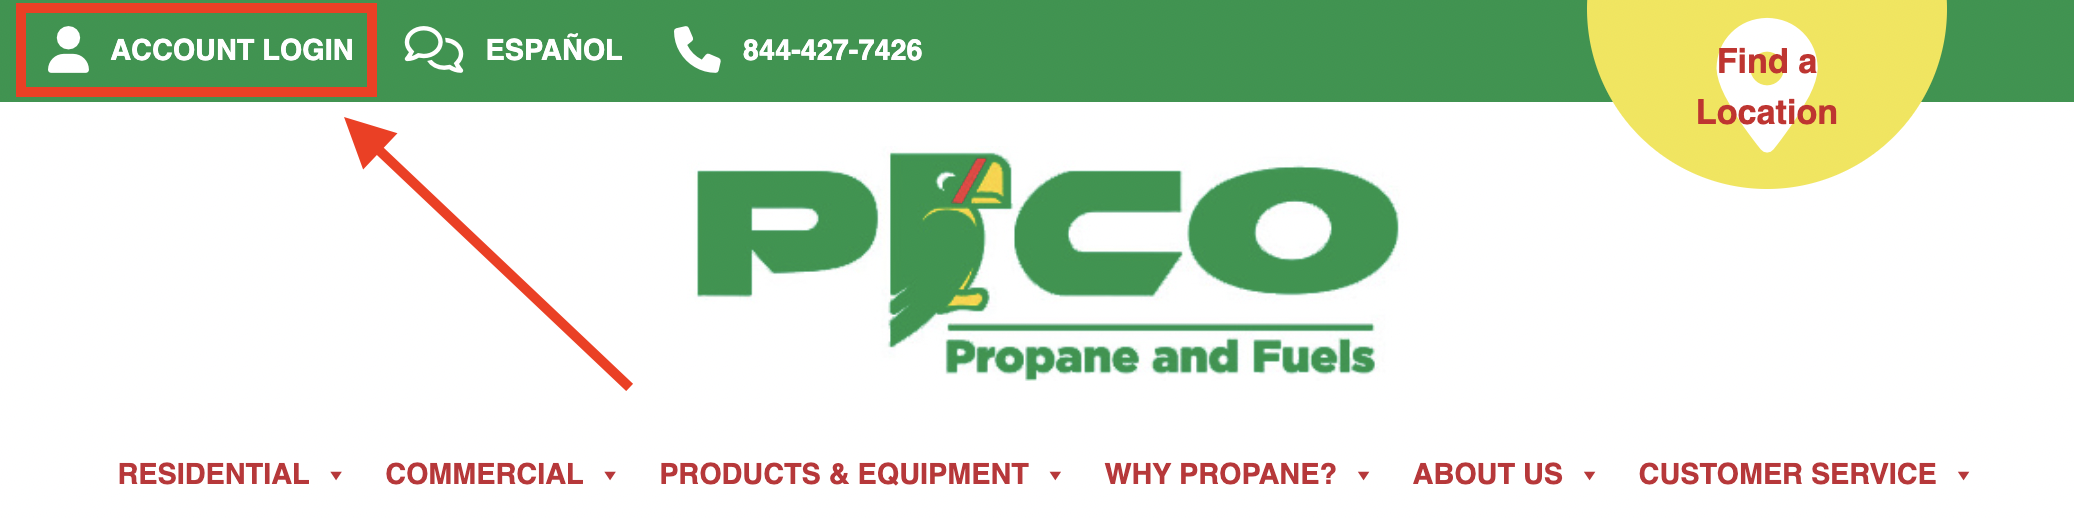
- Click on the Account Login button found in the upper left-hand corner of our website.
- On the right-hand side of the screen, input your existing Pico Propane and Fuels Account Number and preferred Email Address, then click “Register”.
- Once submitted, you’ll receive an email from Pico Propane and Fuels at the email account that you have provided. Open that email and click the “Confirm your Registration” link.
- Head back to the Customer Login page, and sign-in with your newly established credentials. From there, you’ll immediately be able to begin managing your account online!
>> Paying Your Bill <<
Paying your bill online with Pico Propane and Fuels is easy! We’ll take you through the step-by-step process to ensure your payments are successfully sent via the online portal.
- Click on the Customer Login button found in the upper left-hand corner of our website and use your username and password to login to your account.
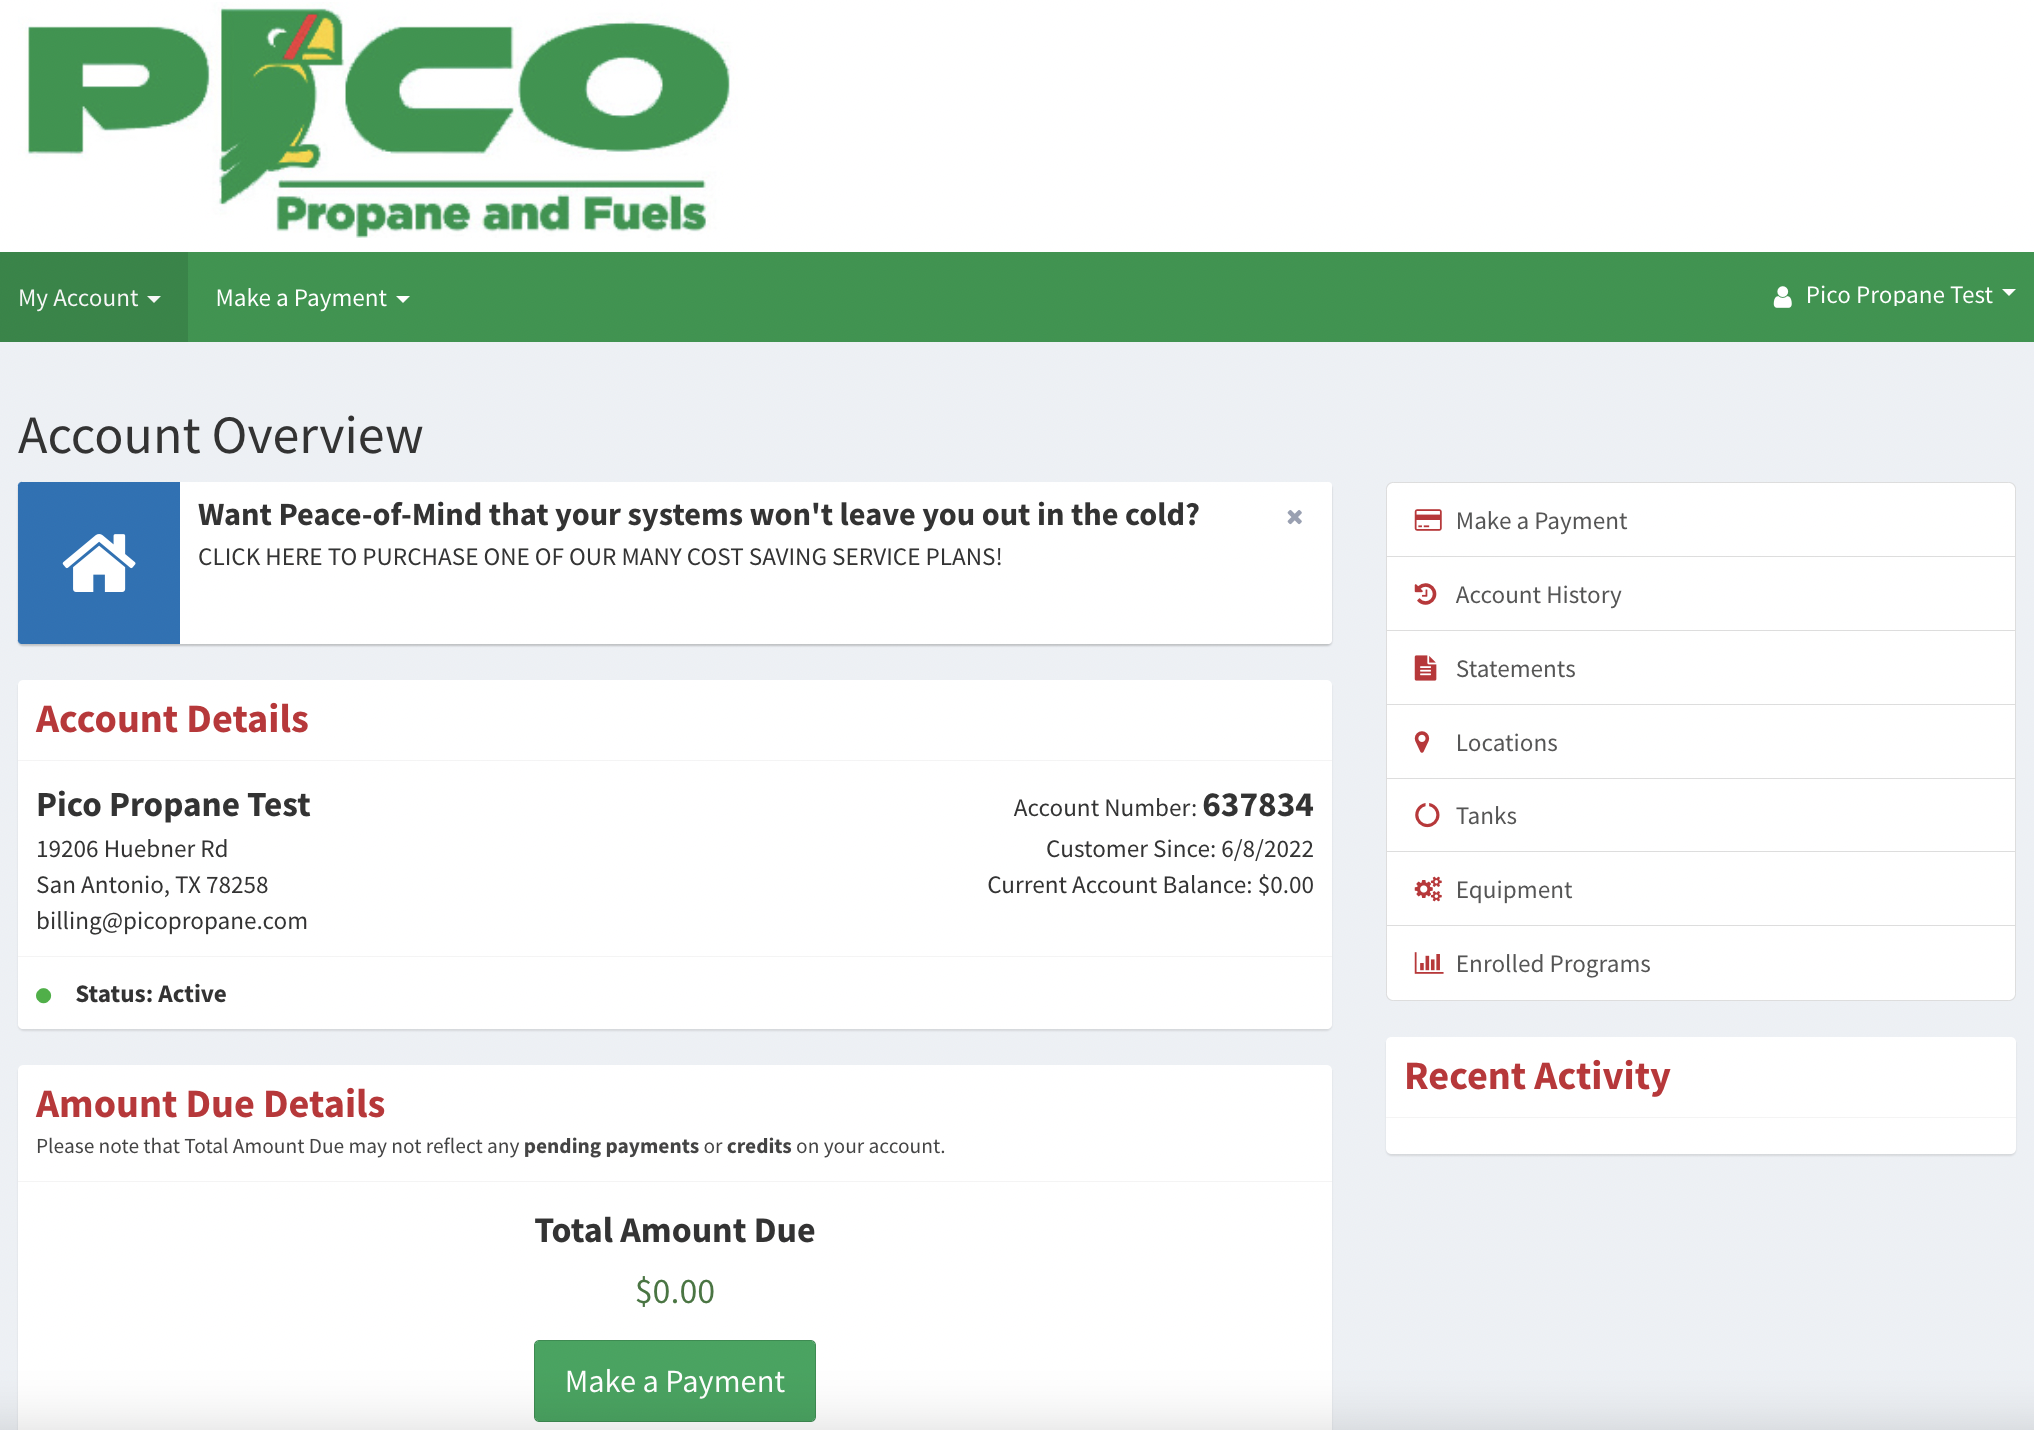
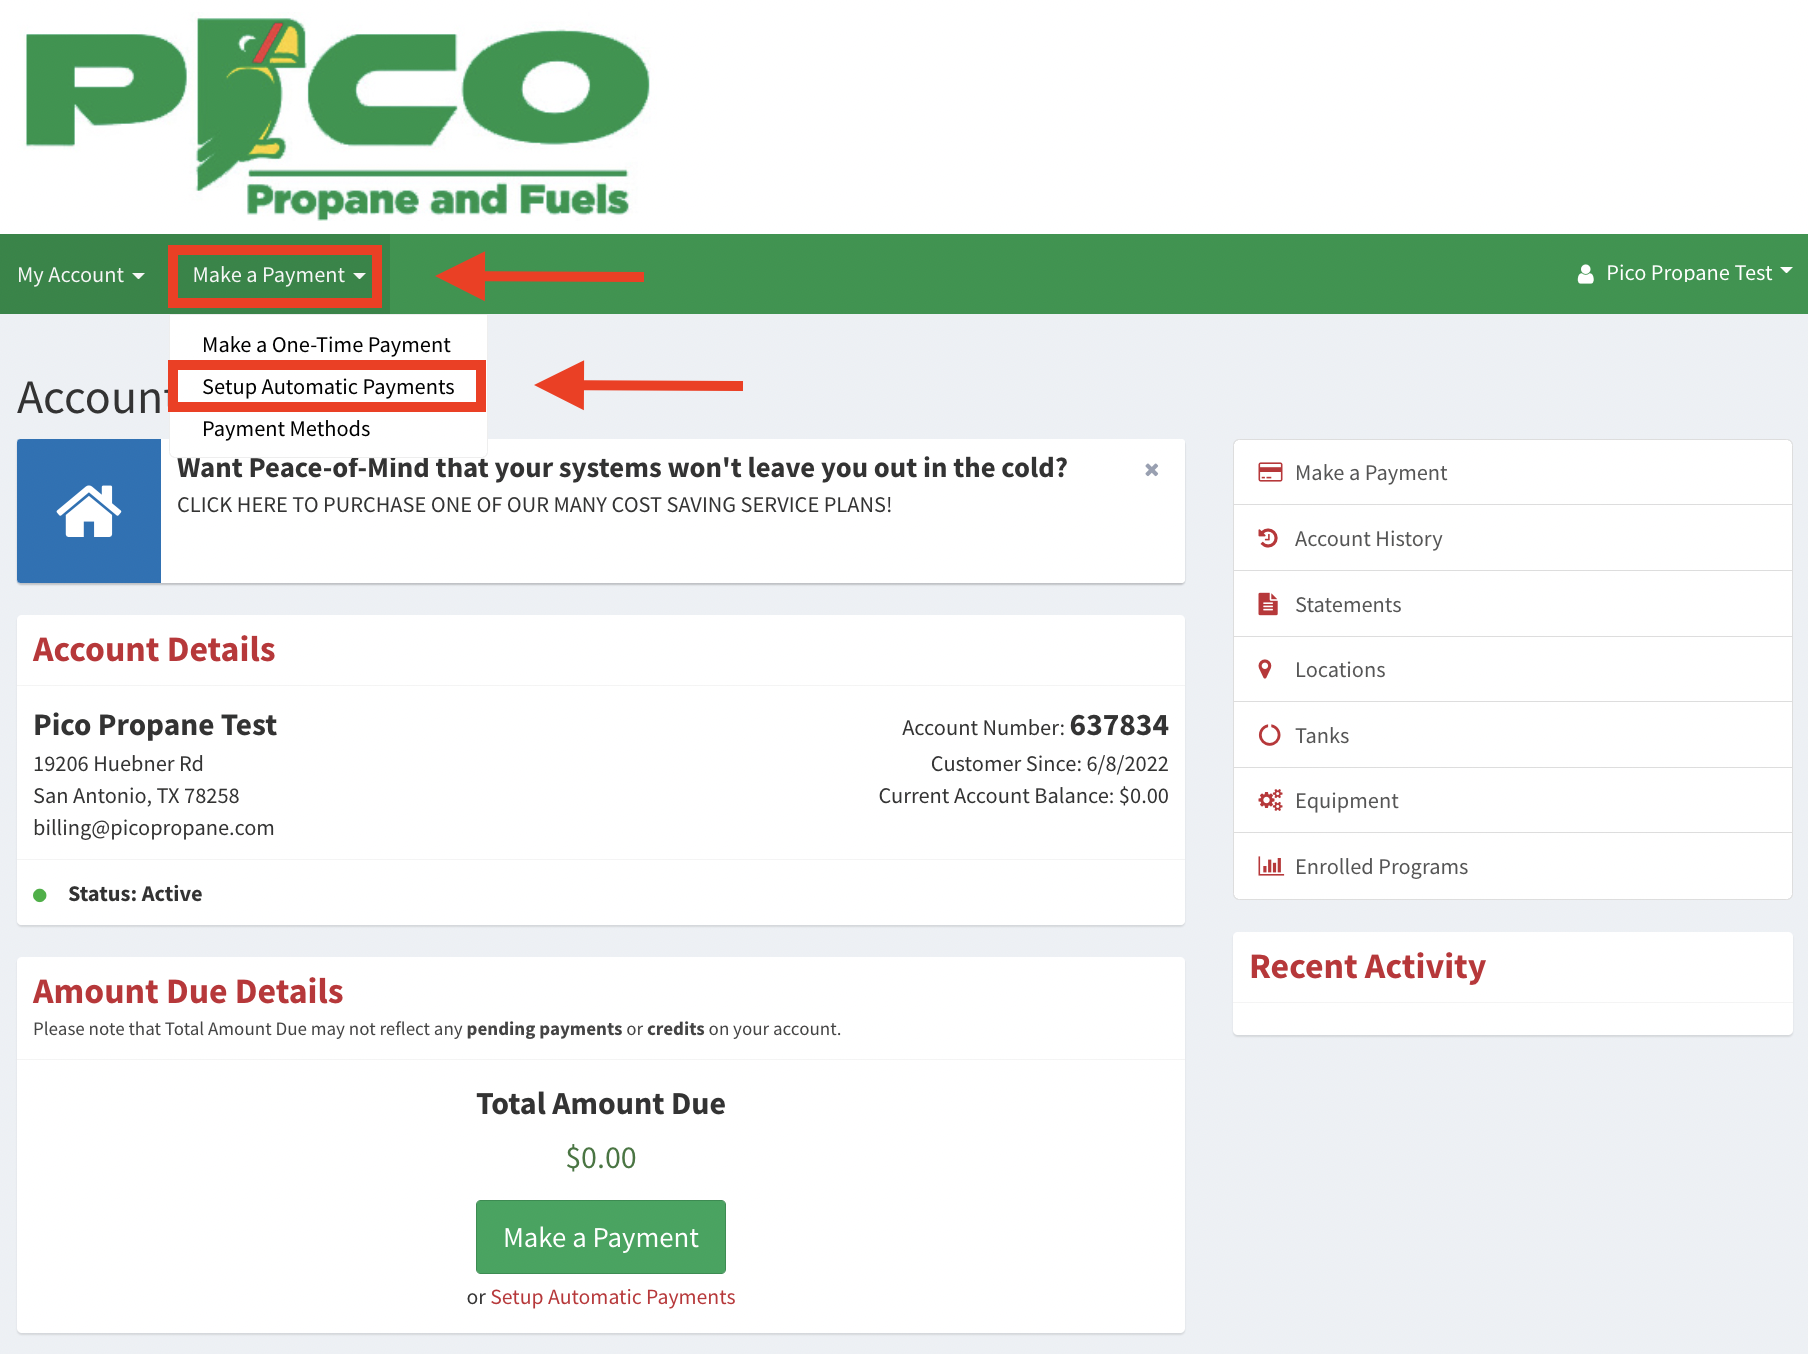
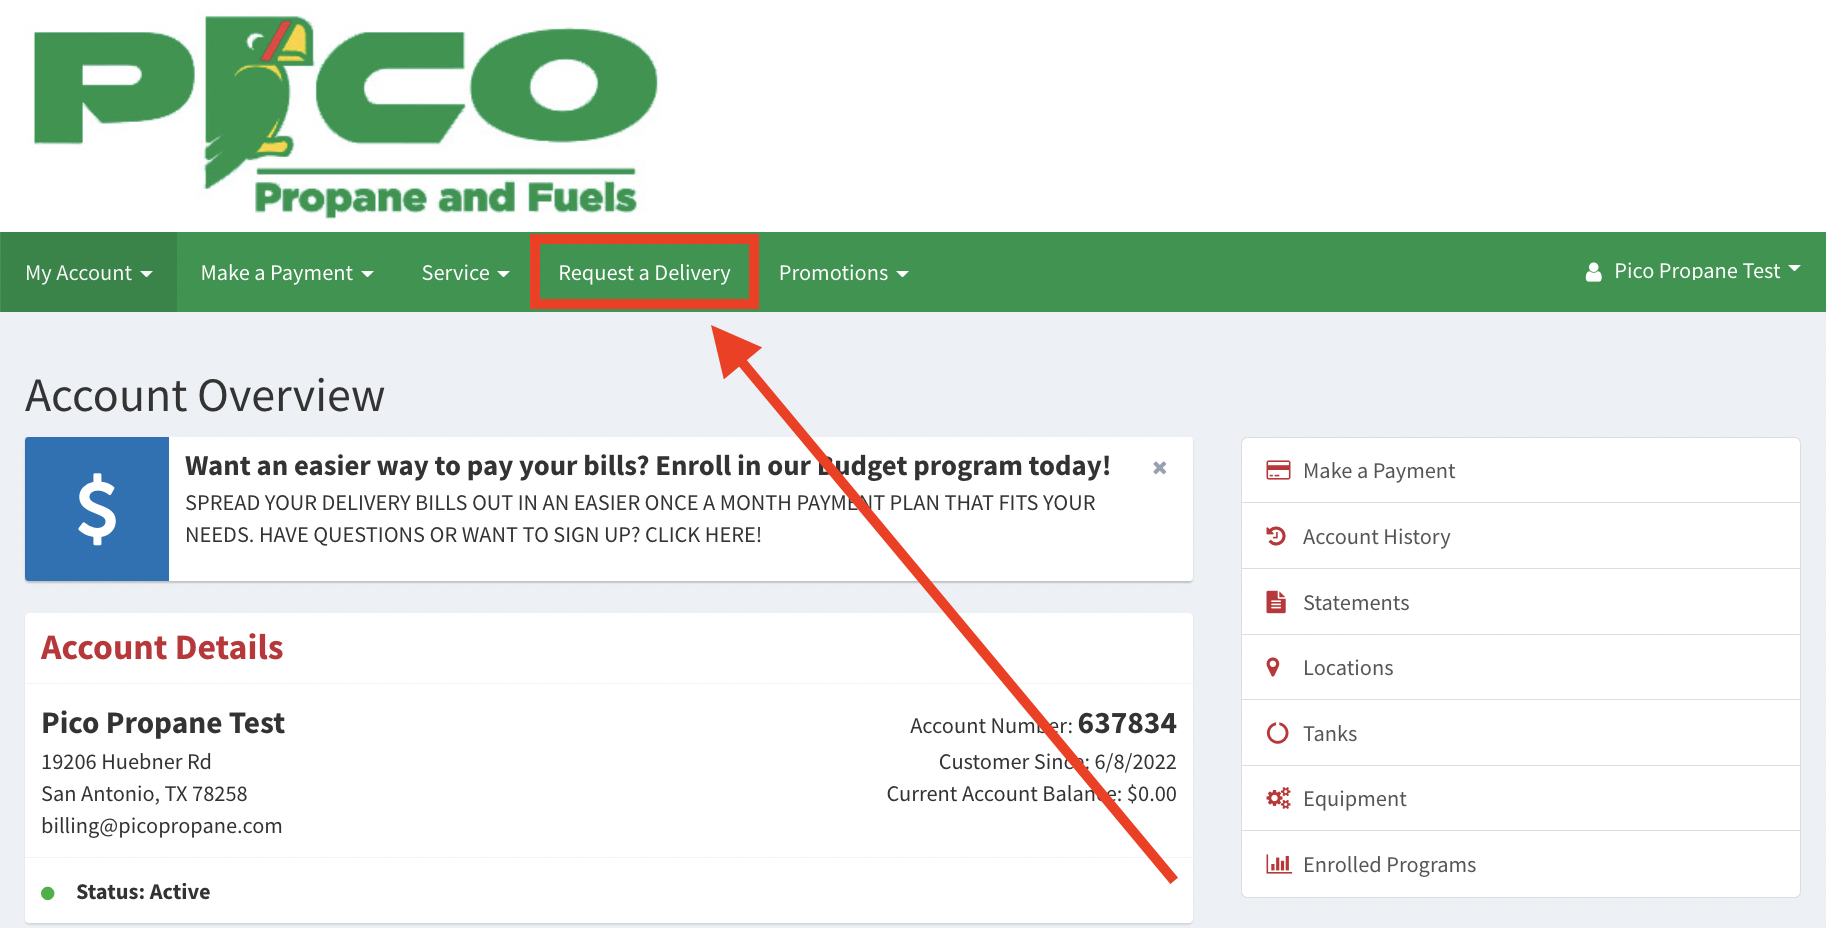
- Once you’re logged in, the first screen you will see is your Account Overview page.
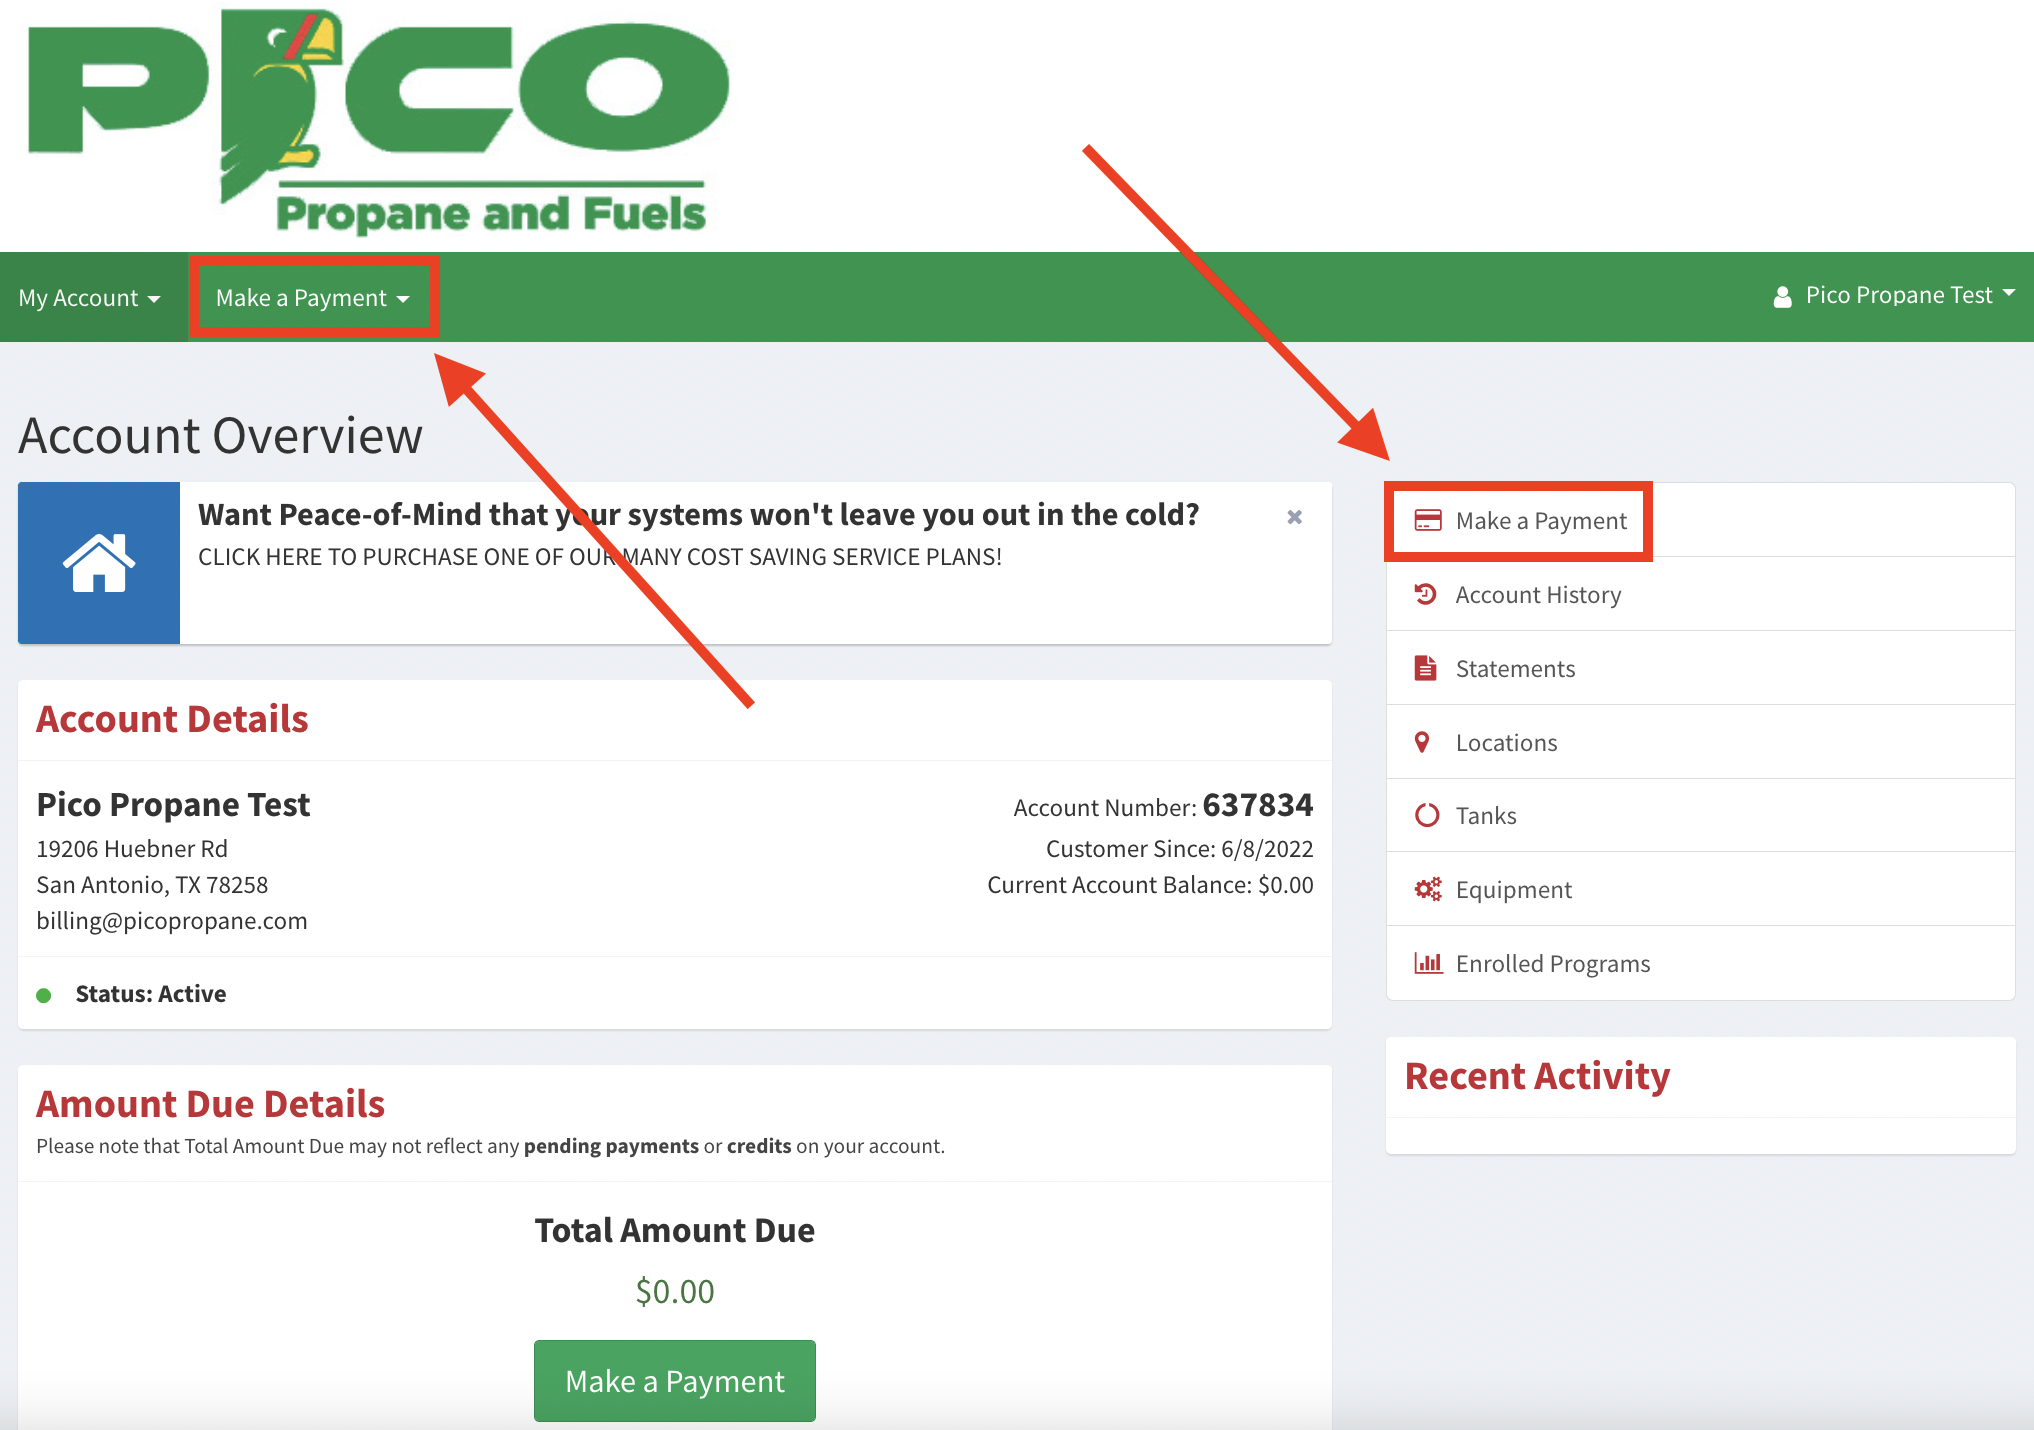
- Click the “Make a Payment” option. Here, you will see the payment screen along with the amount currently due. You can click the button on the left-hand panel, or on the dropdown navigation up top.
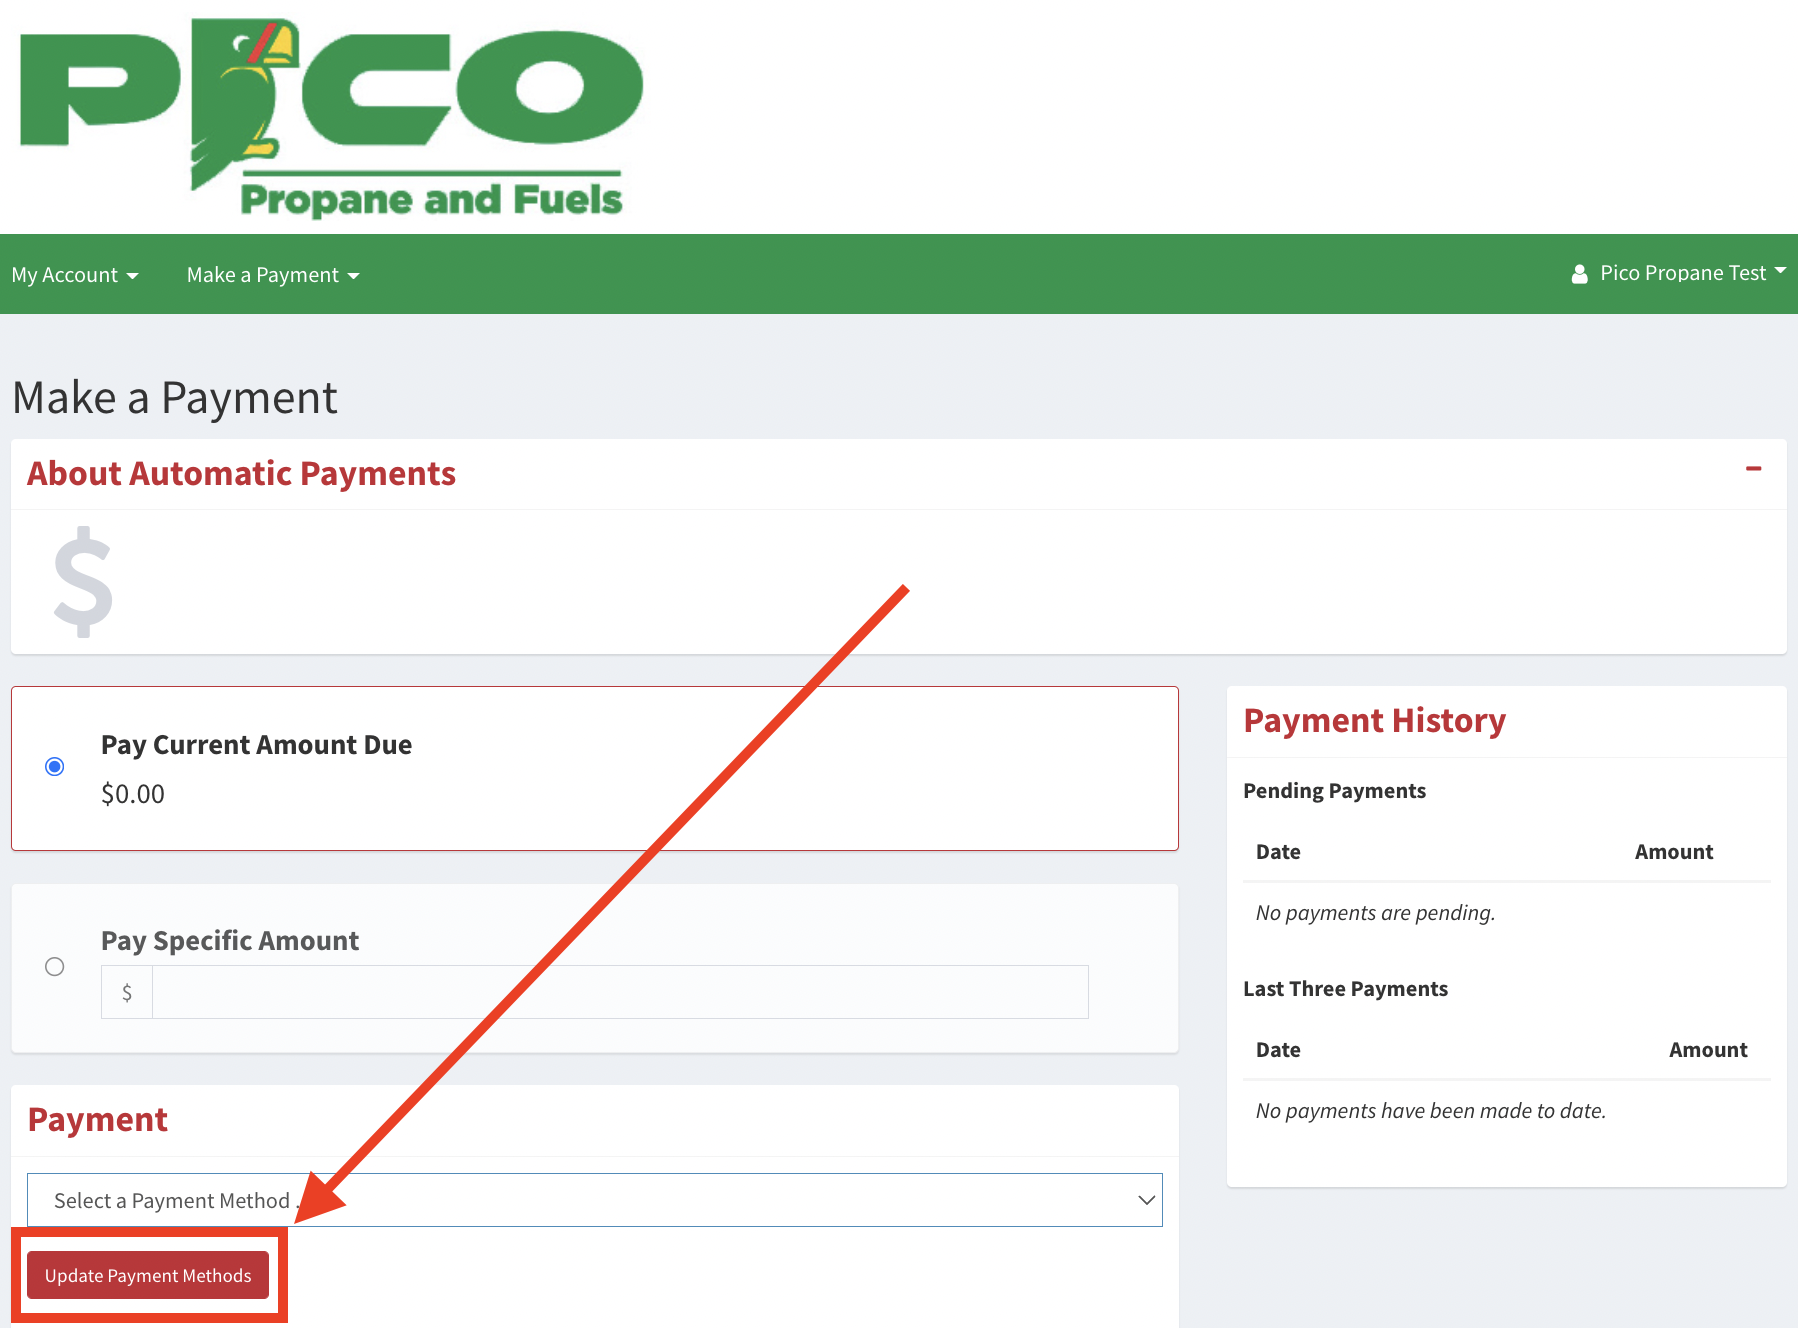
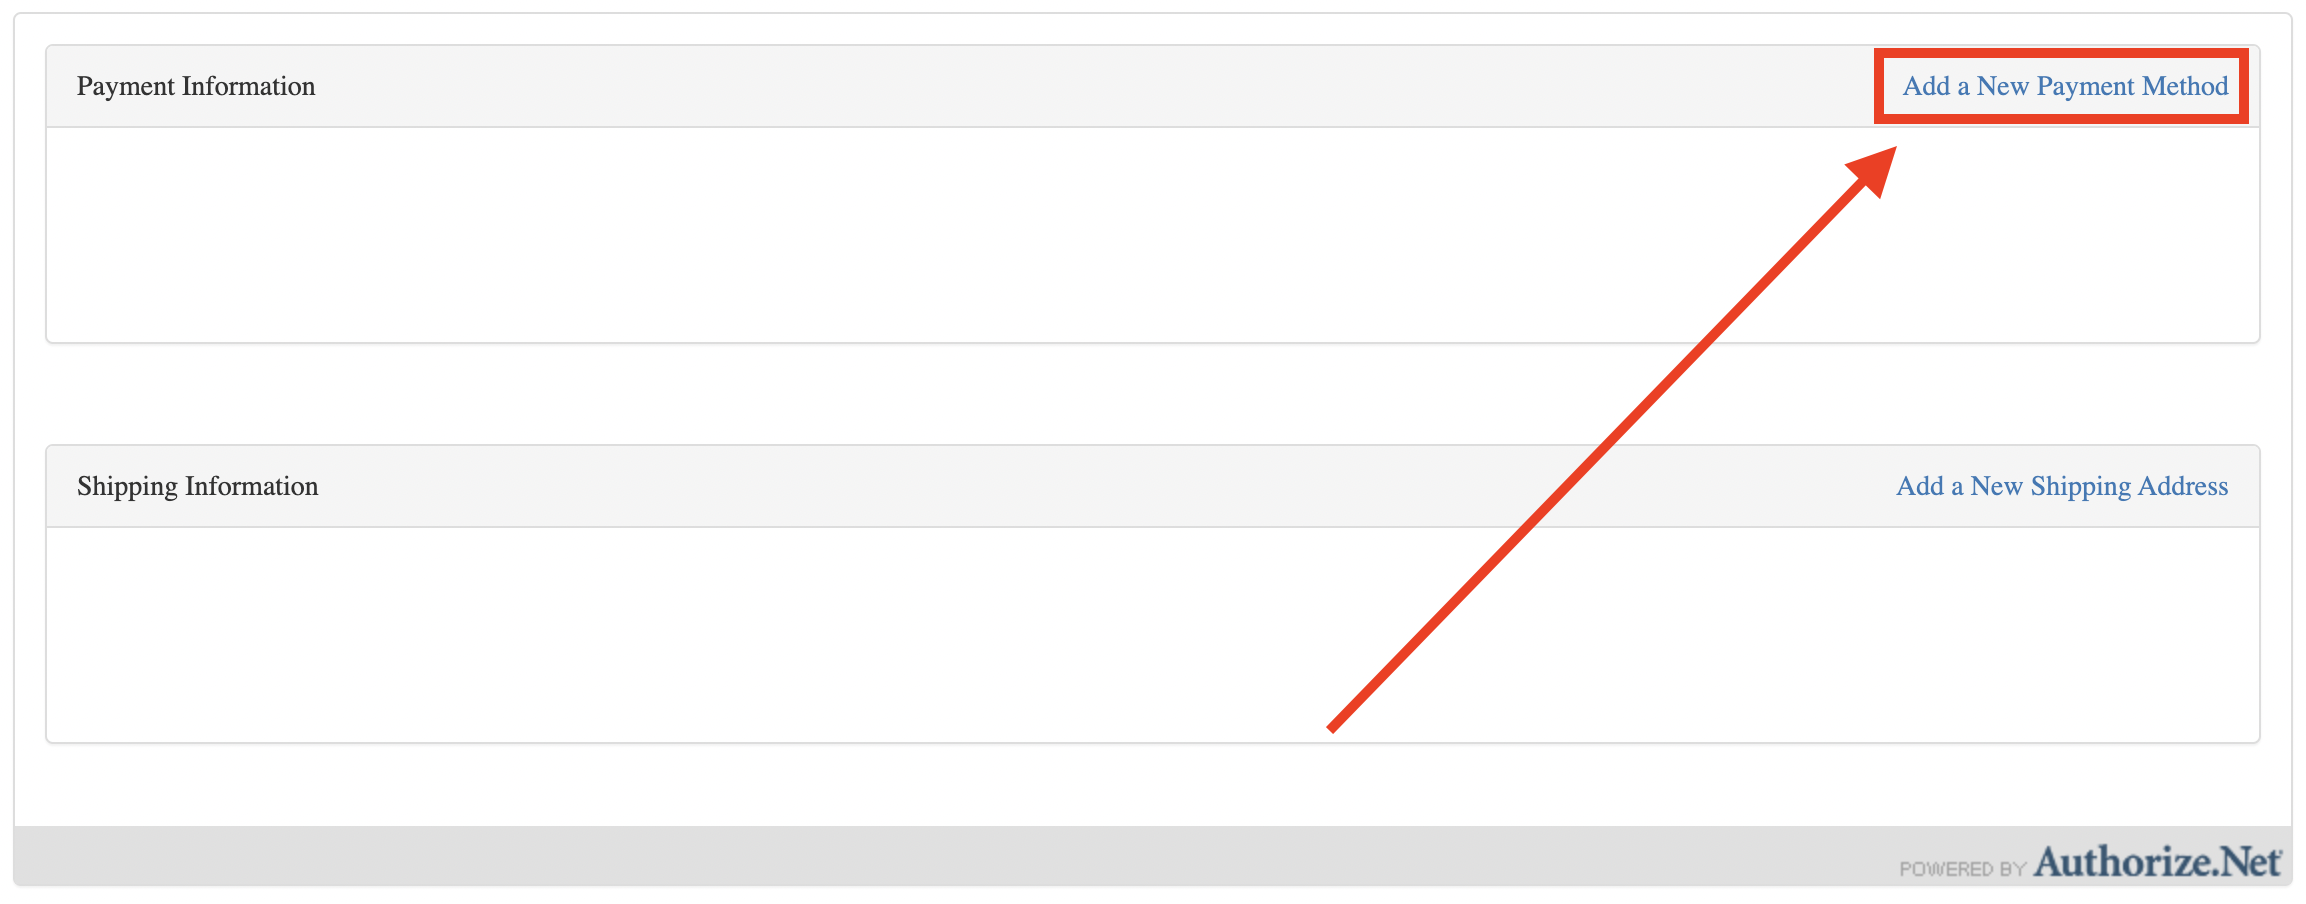
- To add, remove, or edit an existing payment method, click the “Update Payment Methods” button. Any pre-existing payment methods will be shown here as well.
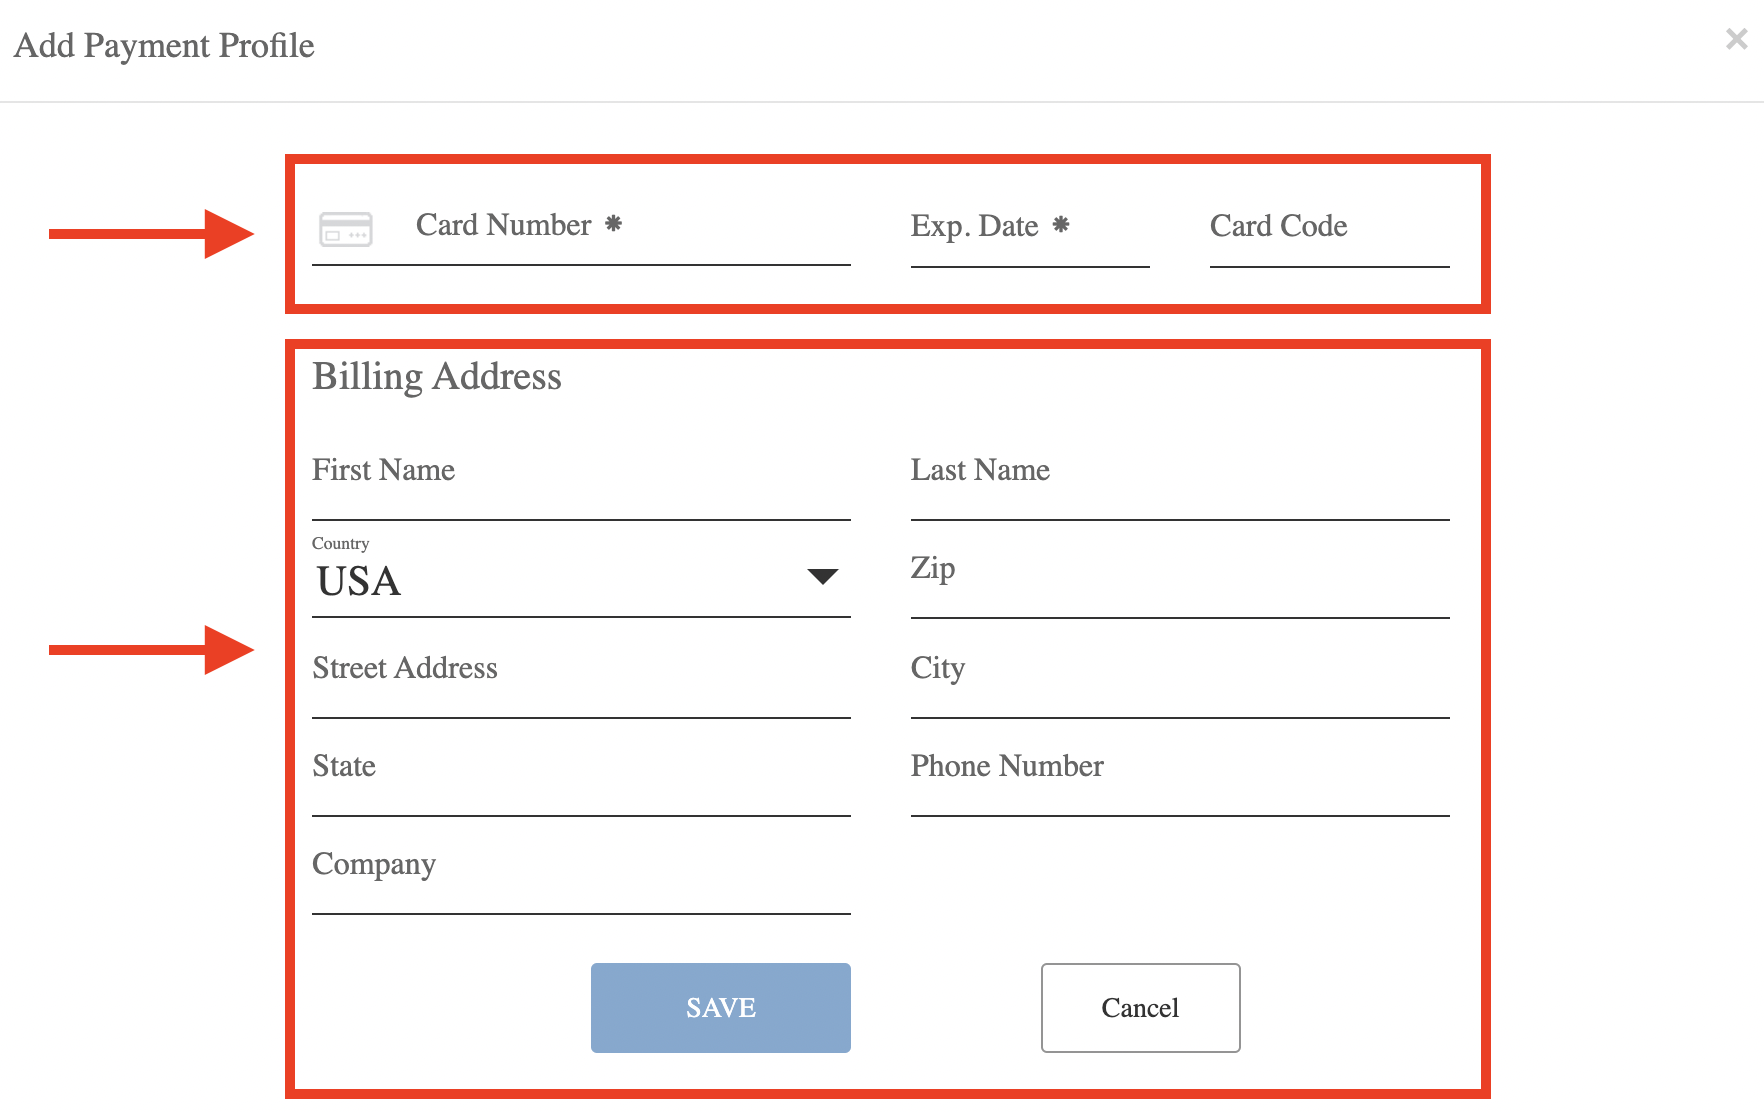
- After clicking “Update Payment Methods”, you’ll be asked to confirm a payment method and billing address.
- Once you submit your credit card information, hit “Save”. You will be brought back to the payment screen where your new payment method has now been added.
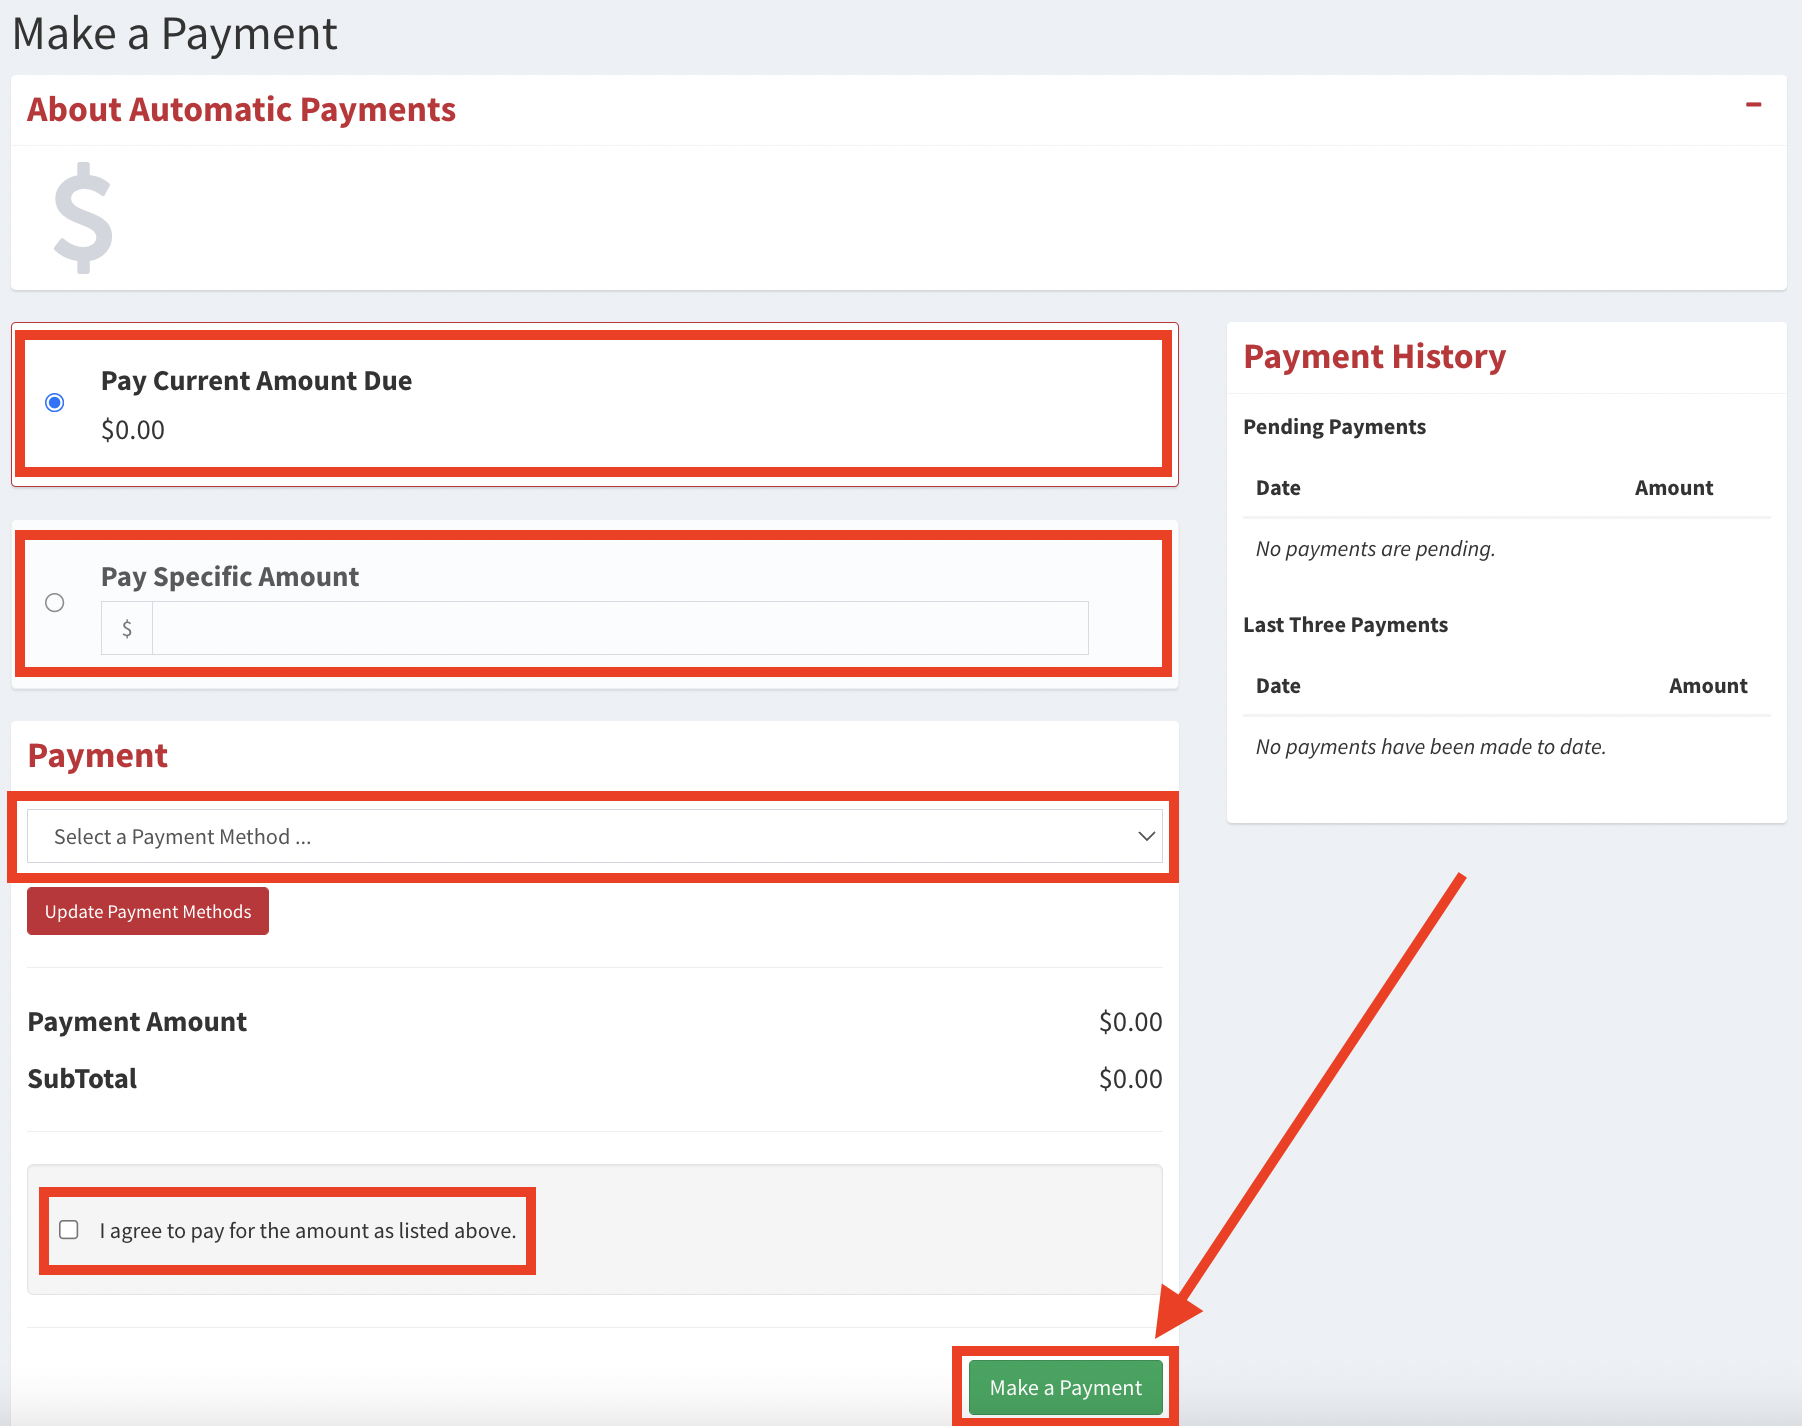
- If you’re ready to now make your payment, select your payment method from the dropdown, and confirm whether you’re paying the current amount due, or a specific amount. Once selected, tick the agreement box, and click the “Make Payment” button to submit your payment. That’s it! You’re done!
Note: You may see any pending payments, as well as prior payments, in the box on the upper right-hand side.
>> Setting Up Automatic Payments <<
- Click on the Account Login button found in the upper left-hand corner of our website and use your username and password to login to your account.
- Once on the Account Overview page, click the “Make a Payment” button, and then click “Setup Automatic Payments” from the dropdown menu.
- From here, click the green “Setup Autopay” button.
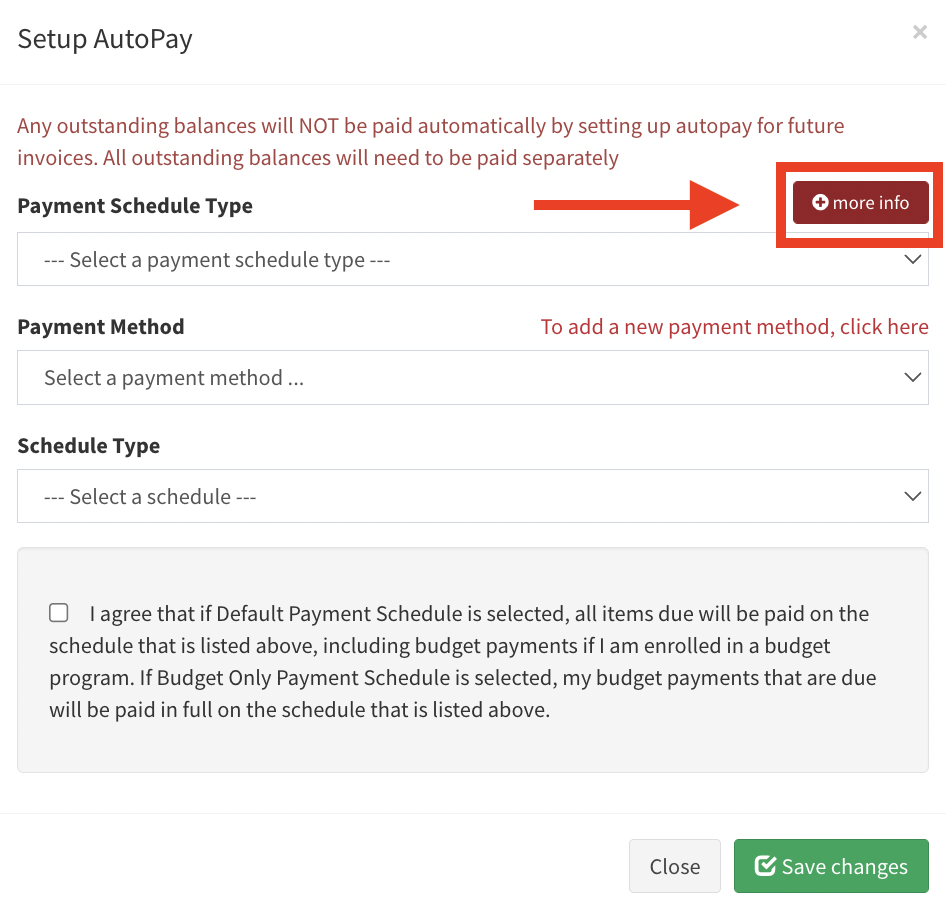
- In the pop-up window, you will see three pieces of information which to confirm, including: Payment Schedule Type, Payment Method, and Schedule Type. You must confirm each of these to complete the setup for Automatic Payments.
- Confirm your Payment Schedule Type. For more information on this, click the red “More Info” button on the upper right.
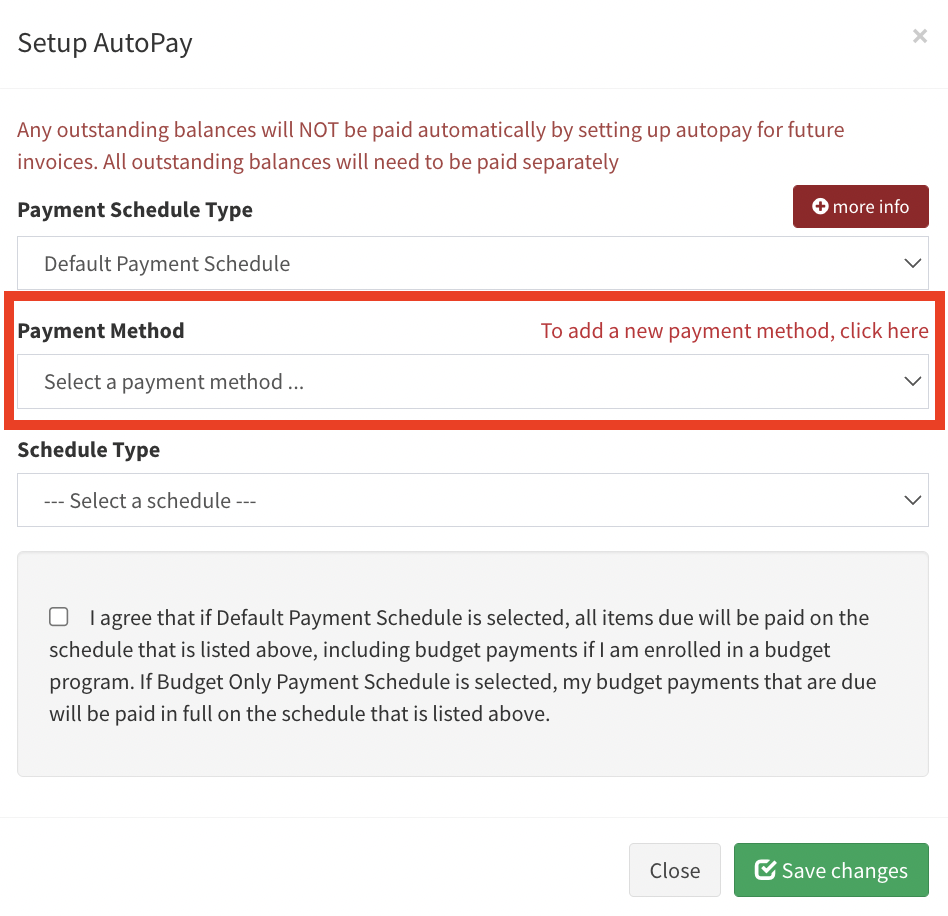
- Next, confirm or add a new payment method.
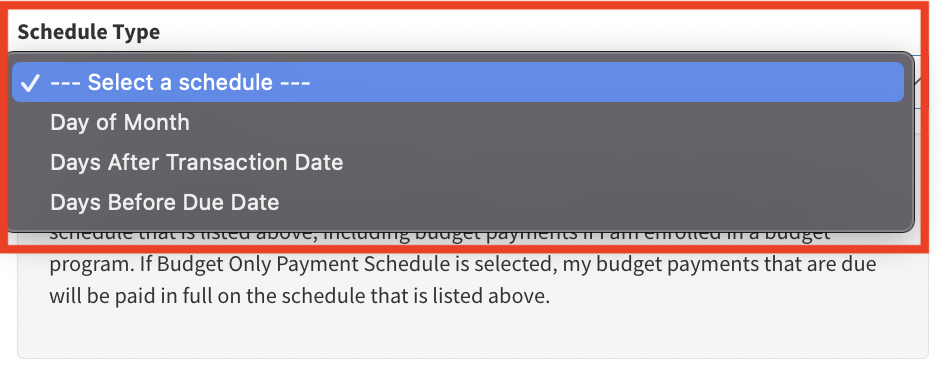
- Next, you’ll choose your payment schedule type. This includes the options for the day of the month, days after a transaction date, or days before a due date. Depending on your selection, you’ll be able to edit the specifics correlated to the proper date or days.
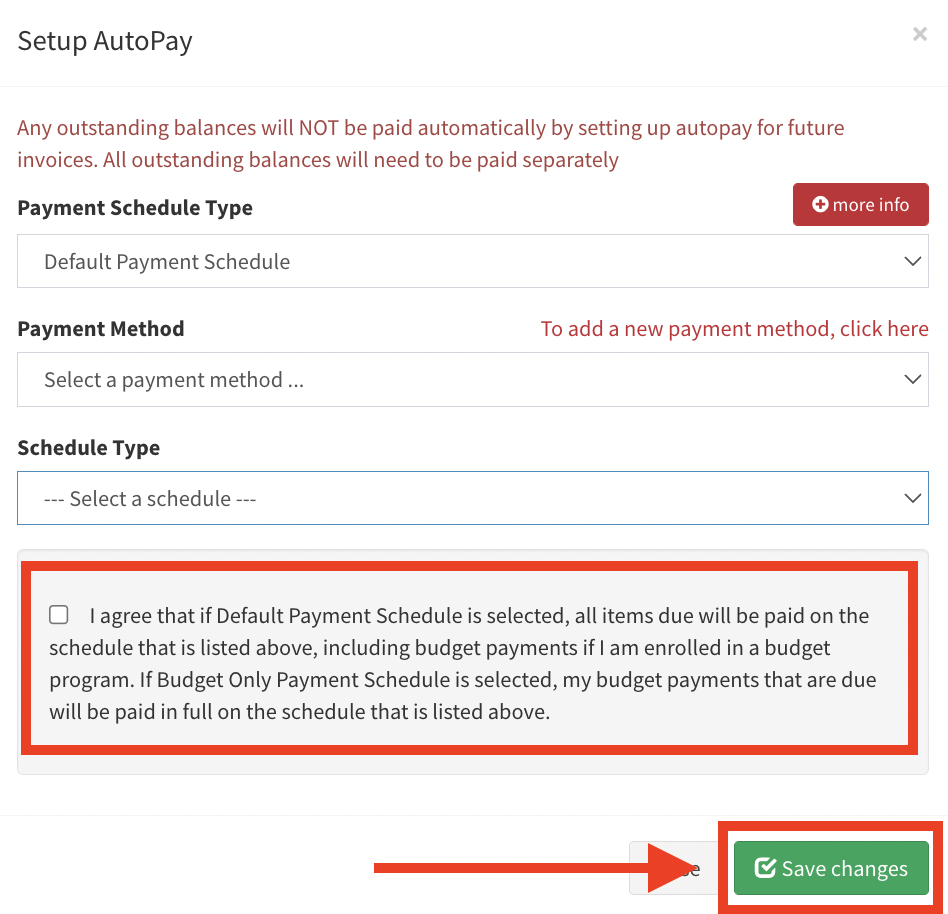
- Finally, tick the box agreeing to the automatic payment terms and hit the green “Save Changes” button. You’re all set!
>> Request a Delivery <<
- Click on the “Account Login” button found in the upper left-hand corner of our website.
- On the top navigation bar, click on “Request a Delivery”.
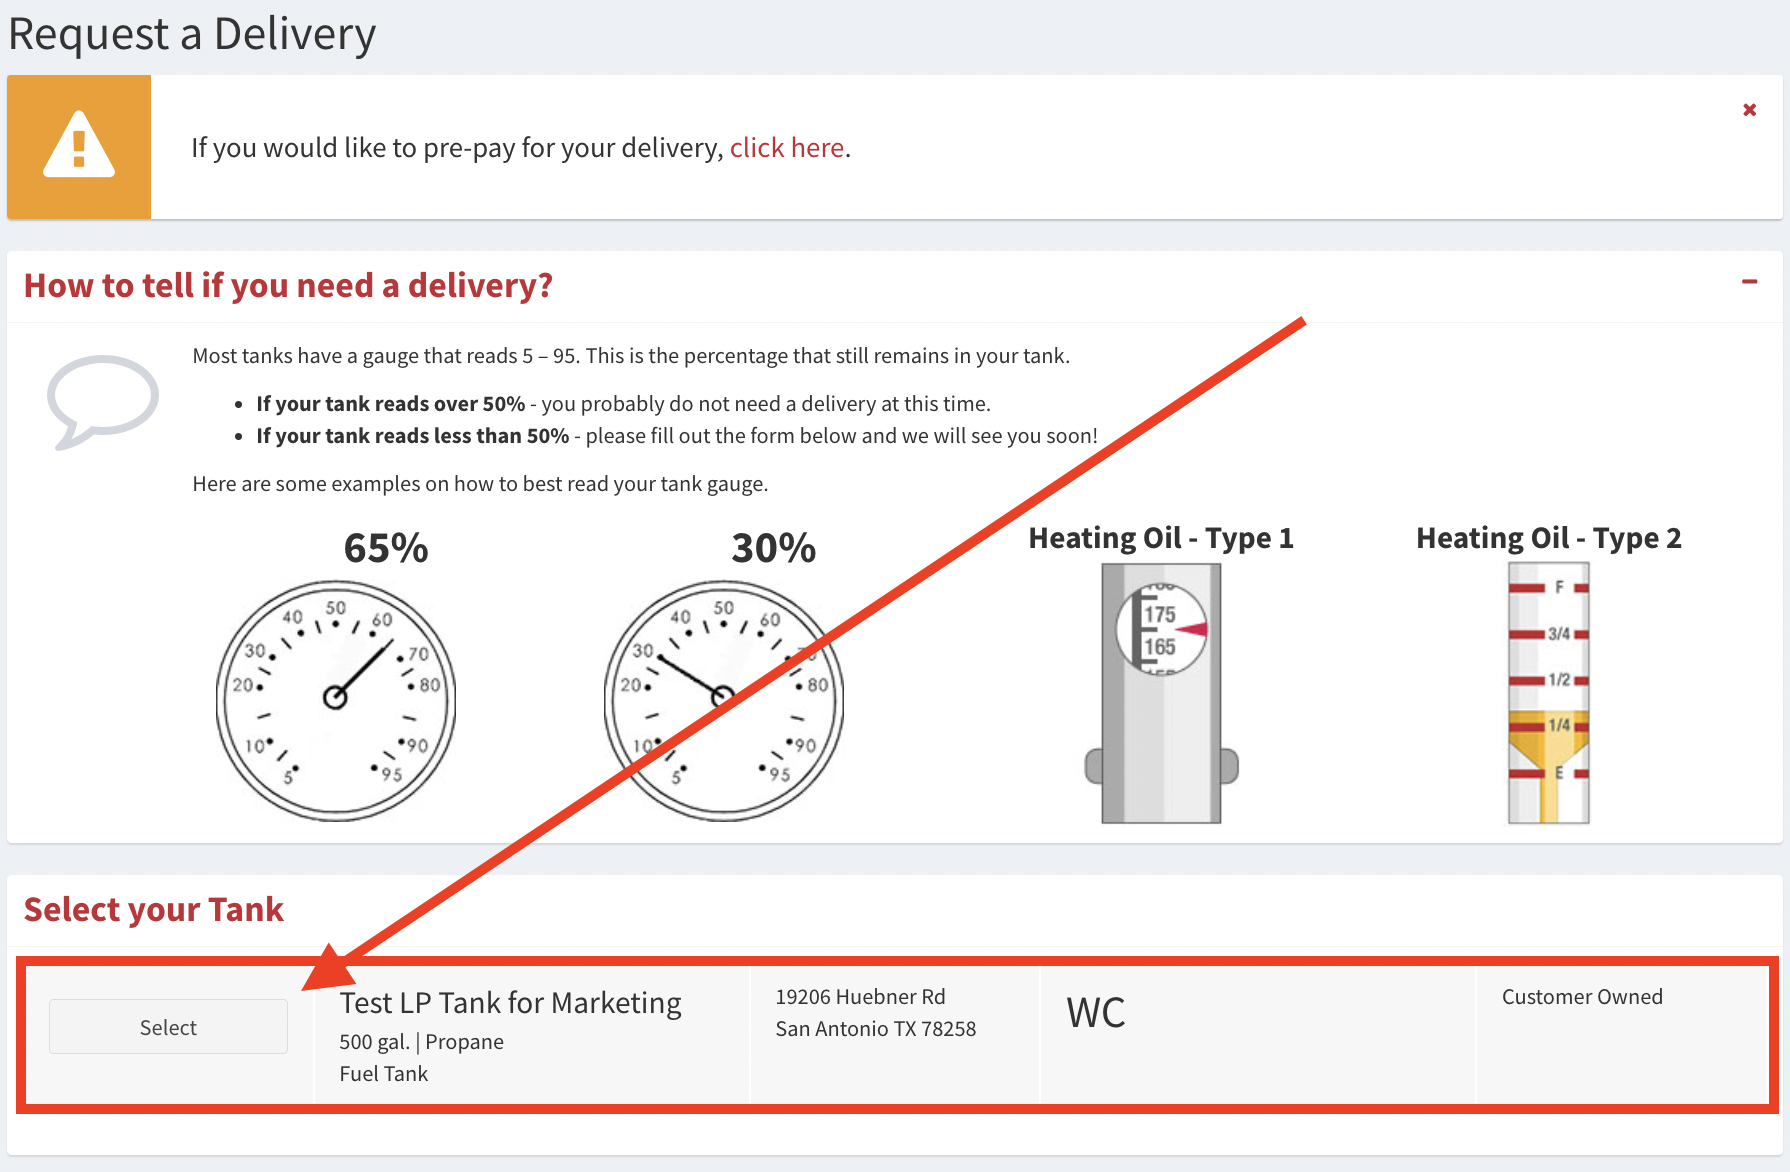
- Scroll down to view all tanks associated with your account. Click “Select” next to the appropriate tank you wish to have filled. Once selected, the box will be colored green, and an additional menu will appear underneath.
NOTE: If you’re on Keep-Full Automatic Delivery, you may see an estimated percentage level/number of gallons left in your tank. If you’re a Will Call customer, you will instead see only “WC” indicated here. Additionally, please be sure to confirm the exact level of your tank by looking at its gauges. The helpful infographic above this panel will detail exactly what to look for!
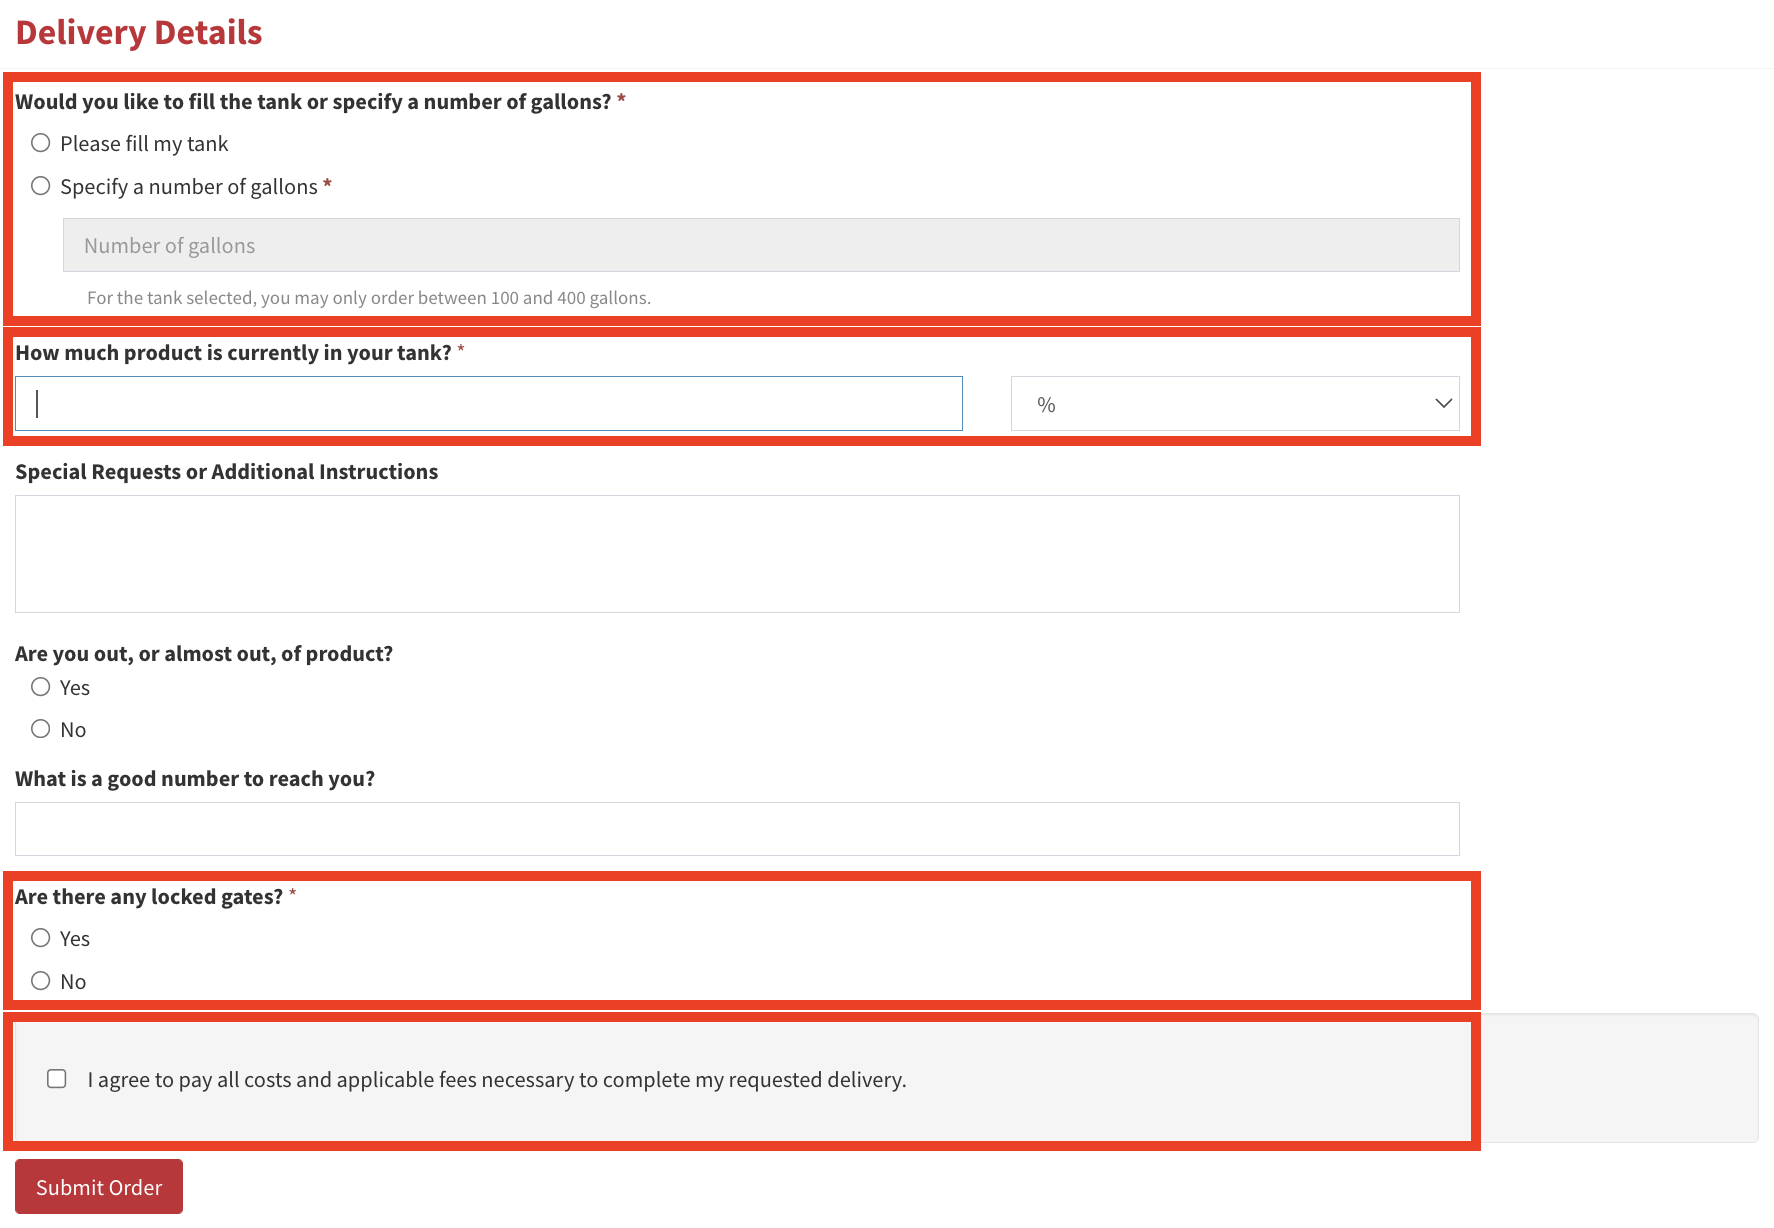
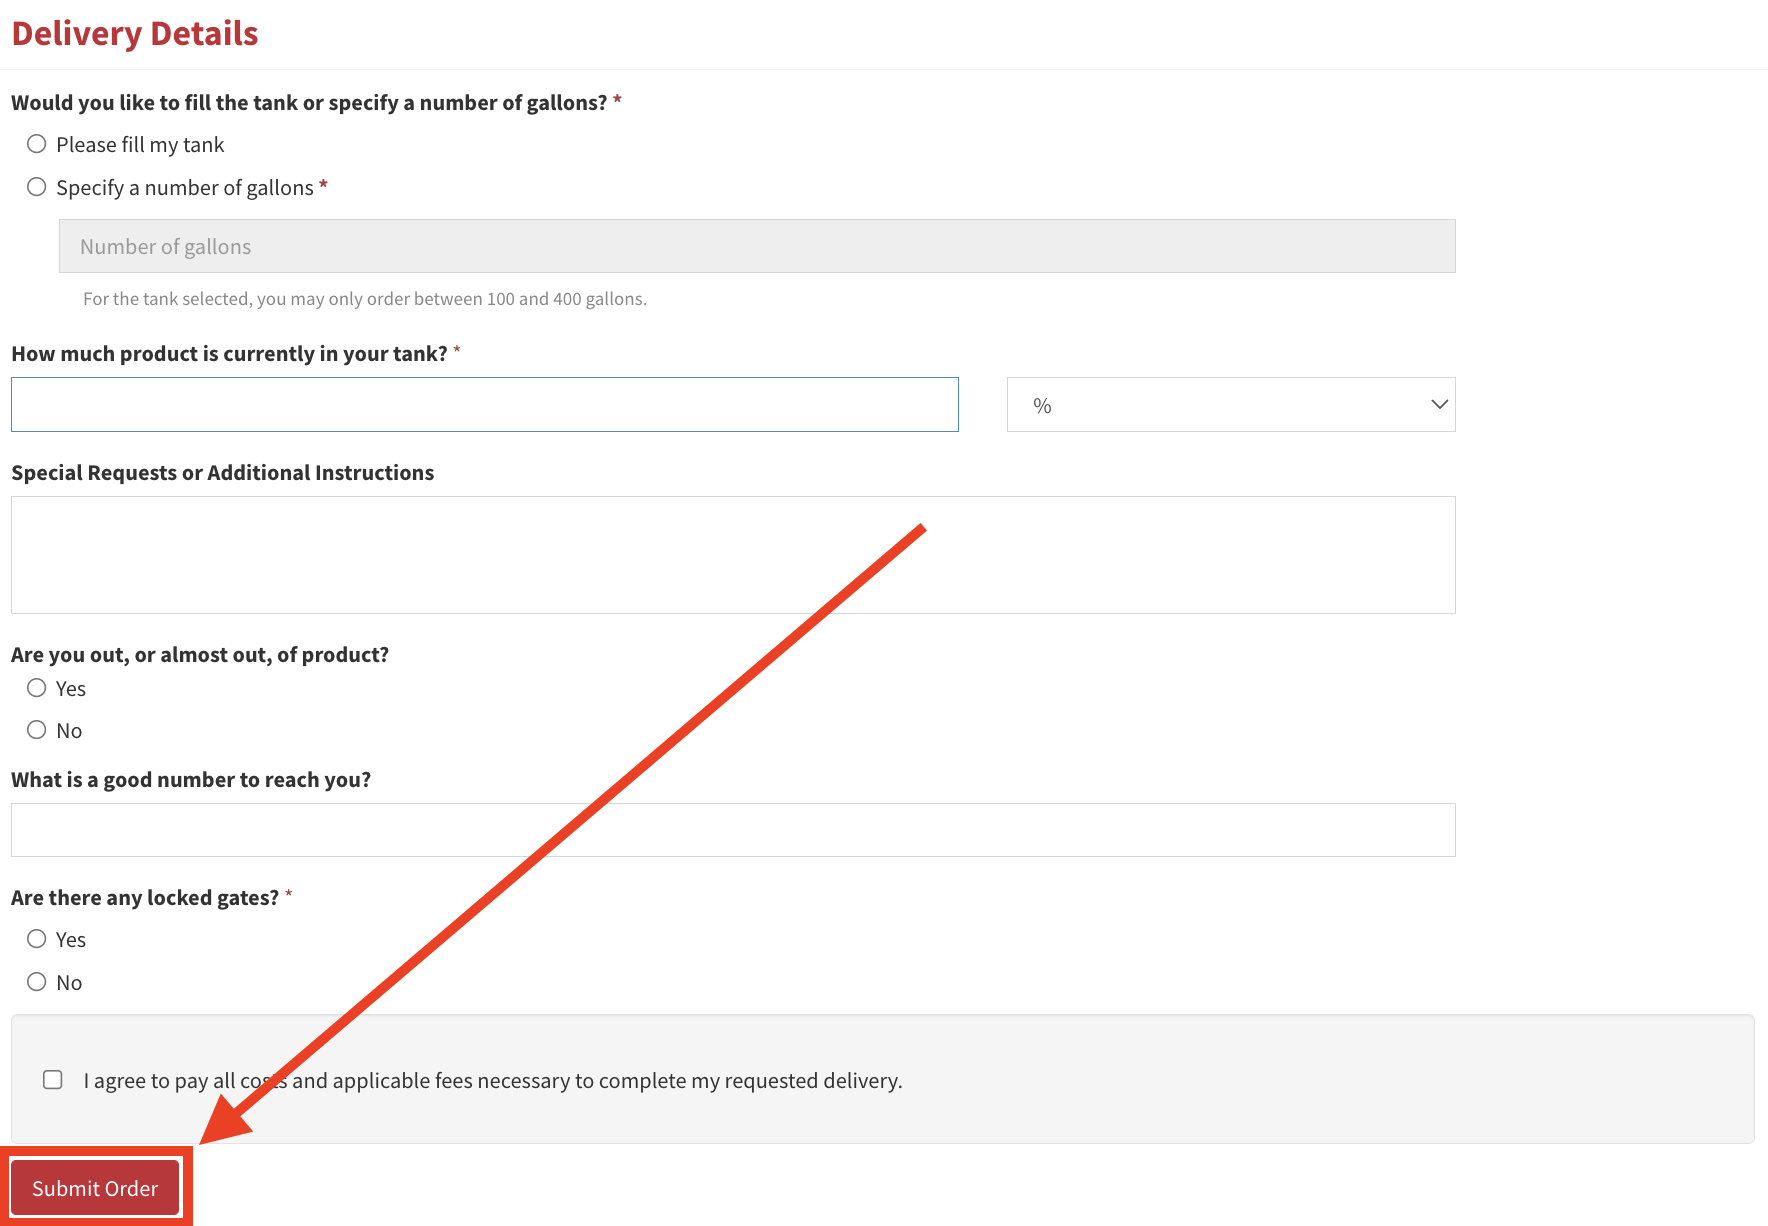
- From here, you can choose if you’d like your tank to be filled entirely, or for just a specific number of gallons. You’ll also be able to write in any special requests or instructions in the space below. Please be sure to also note the best number to reach you, as well as of any locked gates or details to access your tank that our delivery drivers should be made aware of.
- Once completed, check the box agreeing to the payment and costs of your delivery. Then, click on the “Submit Order” button to submit your request. You’re all set! You’ll get an automated email confirming your request and any additional details.
We hope that you enjoy all the new features provided in our online portal! If you have further questions, please do not hesitate to call the Pico Propane and Fuels office at any time at: 844-427-7426. We’ll be happy to help!
More about Customer Service